Handling Fresh Raw Milk

…or Controlling the Funkiness of your Cheese

The most important consideration in good flavored milk and milk products is the proper handling of the milk from the time it is milked out to the time that it is consumed or made into cheese. It makes me wonder about commercially available goat’s milk, which in my experience has a strong “goaty” flavor. The goat’s milk I produce only has had such flavor problems if the steps given below were not followed. Many people who say they hate the taste of goat’s milk are usually referring to ‘store-bought’ goat’s milk, and find mine mild, sweet and rich. Likewise, many commercial goat cheeses taste like they were cured in the billy pen… NOT to my liking.

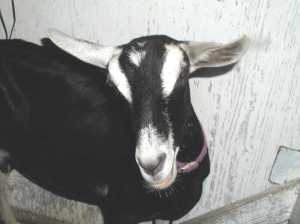
Here are the critical factors I have discovered over a couple of decades of keeping goats and making cheese. All of these are aimed at keeping bacterial contamination as low as possible. Undesirable bacteria are what make milk products have an off flavor. The goal in cheese-making is to add beneficial bacteria which produces good flavor while avoiding the rest. Undesirable bacteria abound on goat hair and dander. Removal of these is the goal of careful filtration.
Never try to make cheese out of “turned” or spoiled milk–the unpleasant flavor will linger. Feed it to your pets if they will drink it. Otherwise, put it on the compost pile.

Note that repeated reference is made to complete drying of thoroughly cleansed equipment. The reason is that most bacteria do not survive well on clean dry surfaces exposed to the air.

Avoiding Bacterial Contamination in your Milk Products

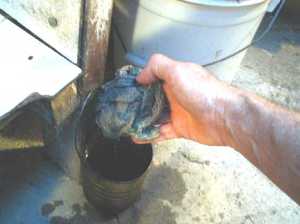
Cleanliness/Sterility of Milking Cans and Storage Bottles:

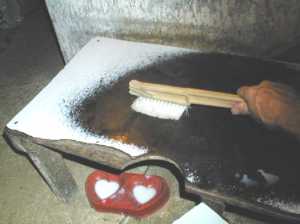
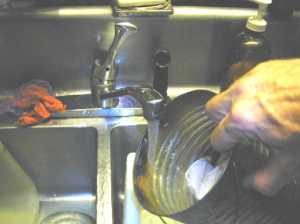
  1. Immediately after milking, rinse equipment in lukewarm water to remove the majority of milk.  If you let the equipment sit, the drying milk will glue itself in the cracks and crevices, and will be come a breeding ground for bacteria.
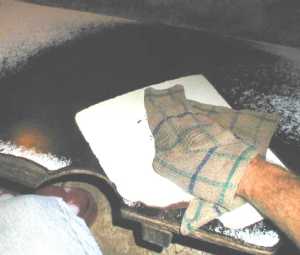
  2. You should carefully wash the rinsed milking cans in very hot soapy water, rinse well, and air dry COMPLETELY. (Do not dry with a towel, it is easy to introduce bacteria this way.) If you have no problems with odor or taste in your milk, actually sterilization of the cans may not be required.  But if you are having problems, your implements should be boiled and air dried.  I avoid chlorine because of its poisonousness, but in the worst cases, may have to be resorted to.

Essentials of Recommended Cleansing:

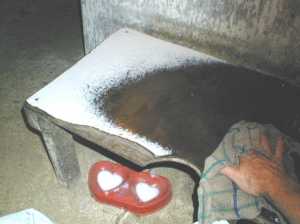
  1. Wash implements well in very hot water and soap
  2. Rinse thoroughly in very hot fresh water
  3. Ensure that they are thoroughly air dried before using

If you must use chlorine for sterilization, use as little as possible, and avoid any trace in your milk.

Stages of Milk Handling


I.  Setting up Milking Equipment

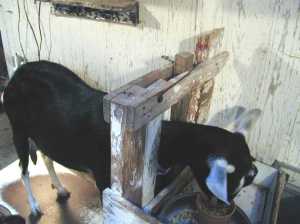
II. Setting up Goat to be Milked

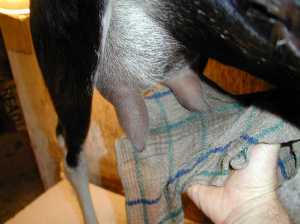
III. Cleansing Udders

IV. Milking and Feeding

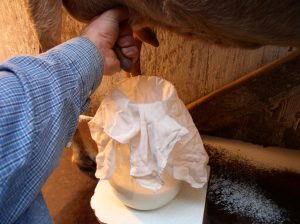
V. Filtering and Recording

VI. Chilling

VII. Cleansing Equipment after Milking

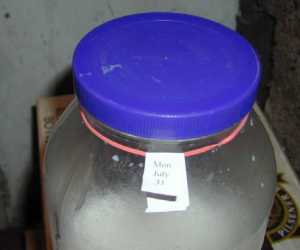
Keep the milk chilled at 4ºC until ready for use.  Do not add warm milk to previously chilled milk.  It will encourage any bacteria in the older milk to grow.  However, once thoroughly chilled, milk from sequential milkings can be pooled.

Follow these steps and maintaining a temperature of no more than 4ºC in your refrigerator and your milk should keep easily for more than a week without pasteurization. If goat’s milk is kept this long, cream can be skimmed off when making cheese. Freeze this cream immediately after skimming to produce delicious ice cream.

If you don’t follow these steps closely, you risk a number of bacterial contaminations including those of Salmonella, Escherichia coli and reportedly, Listeria.

Bacterial Contamination of Meat: Pour Plate Assay

Bacterial Contamination of Meat: Pour Plate Assay

RELATED PROTOCOLS:
Pour Plate Technique for Bacterial Enumeration
Dilutions
Bacterial Contamination of Milk, Pour Plate Assay

DISCUSSION:
Ground beef for human consumption may legally contain up to (hard to believe) 50 million bacteria/gm. The number of bacteria in a given sample may vary by several orders of magnitude.  Therefore, when samples of these foodstuffs are assayed for bacterial count, several dilutions must be prepared over several orders of magnitude in order to achieve the desired range of colonies per plate (30-300). Typically, 1.0 mL of several dilutions from each of the dilutios ( undiluted to 103, or higher) should be plated.  Greater dilution is necessary for more highly contaminated samples. The following procedure is for that purpose:

SUPPLIES:
Ground beef to be tested. Have date of origin, if possible. Calculate age of material.
Standard Plate Count Agar, sterile (SPCA) 15 mL in capped 16 x 150mm test tubes, melted, 45 C , three per student
Sterile dH2O in 4 repipets capable of adjustment to deliver 1 to 10 mL aliquots.
Clean sterile petri dishes, 3 per student.

EQUIPMENT:
wax pencil
sterile 16x150mm test tubes  (four per student)
balance
stainless steel spatula in test tube with 95% EtOH
flame
45o C  Hot Block (or water bath deep enough to equal agar depth.)   One per15 students
vortex
2.0 mL pipets, sterile , 3 per student
1.0 mL pipet, 1 per student
colony counter with magnifying glass

EXPERIMENTAL PLAN FOR ASSAYING BACTERIAL CONTENT OF MEAT:

meat_protocol_P8081413md

PREP OF MEAT SAMPLE, DILUTIONS, AND ALIQUOT ADDITION TO PLATES

Label the bottoms of three empty plates with:
initials
date
specimen
aliquot volume (1.0 mL each)
dilution factor (101, 102 or 103)
Prepare meat dilution blanks by labeling three 16 x 150mm sterile tubes with your initials and the exponents 1, 2 or 3 (dil’n factors 101, 102 or 103.)

02_dilution_blank_P1010001

Prepare dilution blanks:
Repipet 9.0 mL sterile dH2O into each of the three tubes.

02_meat_weighing_P8081391

Prepare a 10% suspension of meat in sterile water:
Weigh out 1.00 g ground beef sterilely into a fourth sterile capped 16x150mm test tube. (Record actual amount weighted out.)
(If you only weigh out 0.8 g of meat, suspend it in 8 mL water in the next several steps. I.e., a 10% suspension.)

Suspend the weighed meat with a vortex and spatula:
Add 3.0 mL sterile dH2O 2, vortex with sterile spatula inserted to suspend well. Be sure to hold the tube near the top to prevent spraying…)
After thorough suspension, add an additional 7.0 mL more sterile dH2O. Vortex to mix well again.

meat_protocol_P8081413md

In the following steps, you will prepare the serial dilutions:
Prepare serial dilutions of the specimen in steps of 101, vortex after each dilution to mix completely. [Greater dilution factors may be achieved by using 0.1 mL into 9.9 mL in one or more of the serial dilutions, or plating 0.1 mL into the final petri dish.]:

For the first dilution, because of chunks of meat in suspension, use an inverted 2 mL pipet as instructed:
1) Use an inverted 2.0 mL pipet to deliver 1.0 mL of sample into first dilution tube = 101. (Invert so that meat particles do not clog up the pipet. Draw fluid to the 1.0 mark, deliver to the 0.0 mark.)

08_meat_plate_aliquot_P8081406
Add the diluted sample to the plate. (Then pour in the melted 45 C agar.)

2) Use a 2.0 mL pipet to deliver first 1.0 mL of 10dilution into the appropriately marked empty plate, THEN deliver the rest (1.0 mL) into the 10dilution tube, vortex

06_meat_pipetting_P8081400

3) Use a fresh 2.0 mL pipet to deliver first 1.0 ml of 10into the appropriately marked empty plate, then deliver the rest (1.0 mL) into 10dilution tube, vortex.

4) Use a fresh 1.0 mL pipet, deliver 1.0 mL of the 10dilution into the appropriately marked empty plate

09_meat_adding_melted_agar_P8081416
Melted plate count agar, 45 C is added to sample and mixed

Add 15 mL 45 C melted agar to each plate in turn, swirl well to mix completely. To ease cleaning, plunge the emptied agar tube immediately into warm water before agar solidifies

After the plate has completely solidified (be patient), invert plate and incubate 35 C for 48 hr.
Meanwhile, pour the contents of the initial meat suspension tube into the quart jar provided (do not pour down the stink, er…, I mean sink…)
The contents of the other dilution tubes may be washed down with hot soapy water.

12_Meat_pour_plate_P7281226

Count the colonies on the plates and calculate CFU per mL.
Remember that colonies imbedded within the agar are quite small, while the colonies on the surface are quite large (see the image to the left).
Each counts as a colony when enumerating the total colonies formed.

Using which of the three dilution plates has between 30 and 300 colonies, calculate the CFU/g meat. (See formula below.)
Enter your results into the class table (your initials, the meat source, its expiration date, CFU /g


CFU/plate x meat suspension factor (10 mL/g) x dil’n factor x aliquot factor (1) = CFU/g meat

1  On the plate shown, 1 gram of meat was suspended in 10 mL, diluted 1 to 10, 1.0 mL of the suspension was plated and 293 colonies formed.  Therefore the count per gram in the meat was 293 x 10mL/g x 10 D.F. = 2.93 x 10³/gram

If testing for E coli H7:O157, substitute MacConkey Broth for sterile water in this step. After dilutions are completed, place suspension in 37oC.