
Displacement Pipetters: Their Care and Use


These instruments have been developed in recent years and have been valuable in manipulating tiny volumes, particularly of solutions of DNA and enzymes used in genetic engineering. They function by drawing fluid into the pipet tip using a thumb-driven piston whose movement is calibrated to draw up a specified volume of liquid. The units of volume are in microliters (µL), also termed lambdas ( l). Since there are a million µLs in a liter, 0.1 mL is 100 µL. The plastic disposable tip is discarded after a single use. The tips are color coded according to their capacity: white for 10 µL, yellow for up to 200 µL, and blue for up to 1000 µL.
The advantage of single-use disposable tips in genetic engineering is that there is no possibility of contamination with endonucleases which would destroy DNA samples. Also, the tips are much less expensive than single-use pipettes. However, the instruments are very expensive (about $200 each), and must be handled and cared for properly. NEVER allow fluid up into the body of the pipetter.
Illustrate a displacement pipette and include all of the following features:
body
thumb plunger
calibrated stop
blow out stop
lock ring
volume of aliquot (in window) capacity range indication
thumb knob (to adjust volume)
shaft
tip
tip ejector button
ejection ring

- Select the pipetter whose range is appropriate for the volume you wish to measure out.
2. Set the volume as follows:
a. Loosen the lock ring at the base of the thumb plunger.
b Rotate the thumb knob until the desired number of µL appears in the window . [Do not go above the specified range of
the pipetter or you may damage the instrument.]
c. Snug the lock ring. (Do not over-tighten.)
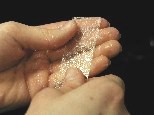
3. Attach a fresh tip to the pipetter:
a: Open the box of sterile tips.
b: Press the pipetter firmly down onto one of the tips, tap once or twice to firm the fitting.
c: Pull out the attached tip, immediately close the box to maintain sterility.
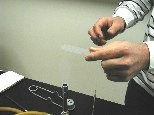
4. Draw up the desired volume of fluid:
a: Before you insert the tip into the sample solution, gently depress the plunger to the first (calibrated) stop and hold in
place. DO NOT GO PAST THE CALIBRATED STOP.
b: Insert the pipetter into the sample solution so that the tip is about 3 mm below the surface.
c: Allow the plunger to slowly and smoothly return to its original position. Note that fluid is drawn up into the tip (no
bubbles). DO NOT LET FLUID ENTER PIPETTER BODY.
d: Withdraw the pipetter from the sample vessel, flame and re-cap vessel to maintain sterility.


- Deliver the fluid into the receiving vessel:
a: Insert the pipet into the receiving vessel so that the tip a: is 3 mm below the surface of the receiving fluid, or b: touches
the bottom of the empty vessel.
b: Depress the plunger slowly and smoothly until the first stop is felt.
c: Press more firmly on the thumb plunger to blow out the remainder of fluid. You should see a bubble expelled.
KEEP THE PLUNGER HELD DOWN.
d: Withdraw the pipetter from the vessel, dragging it along the side to leave any adhered fluid.
e: Allow the plunger to return to its normal position.
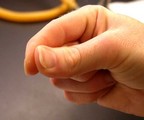
6. Discard the used tip (unless you are to deliver additional aliquots of the same fluid):
a: Hold the pipetter over a discard vessel.
b: Depress the tip eject button with the thumb until the tip is ejected
PRACTICE USING THE PIPETTER’S FEATURES

Per desk for practice by two students:
2 20-200 uL pipetters
2+ non-sterile tips in a tray
test tube rack with:
2 13 × 100 mm test tubes, half full of water
4 13 × 100 mm test tubes, empty
- Unlock the lock ring, select the volume by rotating the thumb knob. Do NOT exceed the range of the pipet as indicated on the handle top. Relock (gently).
- Gently press the plunger to the first calibrated stop, press more firmly to feel the blow out stop.
- Pick up a tip from a non-sterile practice box by tapping the pipetter firmly into the tip, then return tip to a different hole in the box, ejecting the tip by pressing the tip ejector button.
- Set the pipetter to 100 µL, and draw up this volume of dH2O, deliver into a clean test tube. Change setting to 10 µL, deliver to a second clean test tube. Note how small a volume this is.


