Durres is an active Albanian port from which we took to ferry to Bari, Italy.


Durres is an active Albanian port from which we took to ferry to Bari, Italy.

Elbasan is a historic town in Albania, still possessing evidence of its ancient cultural heritage.


Ohrid is a lovely gem of a town located near the border of Albania. It hosts a famous music/arts festival in the summer. It possesses an ancient fortress and a Roman theater. Ohrid’s pedestrian way ends at a beautiful waterfront.


Bitola, in southern Macedonia, is home to our wonderful cheese making friend Nicolce. He gave us the grand tour which included Macedonian dancing with a live band, with some beautiful and talented young women from a local performance group.
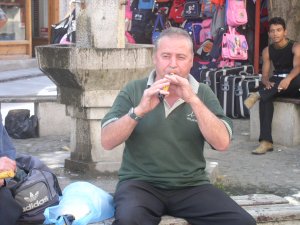
The stoves for sale on the streets of Bitola are used to grill paprika peppers to prepare them for winter storage.


We flew to Istanbul and spent a day enjoying this fabulous city with its ancient churches/mosques.


The bus station from Istanbul consists of more than 200 different offices, each with its own little bus route or two…


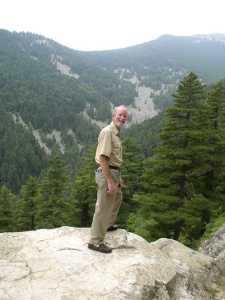
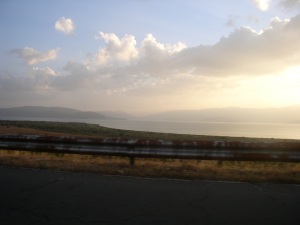
These pictures were taken during a whirlwind ten days traversing through Macedonia from Istanbul to Durres Albania, then by ferry across to Bari Italy, and train to Roma.
We will have MUCH more to say about our experiences, but I must first say that we continue to be impressed and gratified at the hospitality and generosity of people we meet around the world. Macedonians have a rich cultural history and have done well at preserving it.
Click on the image to enlarge it OR click on the text to reveal an additional photo gallery:

Istanbul: Ancient Churches & Mosques


Nutrition is the outstanding biological consideration which makes salads important. Raw dark green leafy vegetables are superb sources of vitamins A, C, E, (the anti-cancer vitamins) and K, as well as possessing respectable quantities of the B complex. Vitamin C is particularly difficult to obtain in adequate quantities in winter months, making the consumption of salads at that time even more valuable. In addition, one’s susceptibility to colds and infection increases when supplies of C and A are diminished. An excellent supplementary source of fresh salad makings during the winter months are sprouted seeds (alfalfa, broccoli, etc). See a previous handout on sprouting seeds.
Often, a simple salad can be both elegant and delicious especially if made with fresh ingredients. Darker greens such as kale, spinach, arugula, etc, are especially rich. Darker leaved lettuce such as romaine, Bibb, and leaf lettuce are far superior to iceberg lettuce which is nutritionally relatively poor. Garlic is a mainstay for many salads. If you wish to add variety to your salad, you might add one or two of the following: red bell pepper, grated carrots, grated apples, parsley, onion, grated or cubed cheese, or even anchovies. However, combining too many different ingredients can detract from its enjoyment.
A salad is “dressed” with oil and an acid, usually lemon juice or vinegar. Important to proper dressing of a salad is to remember to use relatively dry makings so that the oil will stick to the leaves. After the greens are properly coated with oil, then add the acid, usually in the proportion of 1:2 or 1:3 parts acid to oil. Do not add the acid until shortly before serving since the acid will draw out the liquid from the greens by osmosis, resulting in a wilted salad.
For four salad eaters:
1 medium-large clove garlic minced
1 cup. coarsely chopped, deveined kale, spinach, and/or dark green lettuce.
1 cup fresh alfalfa sprouts
1/3 cup finely chopped parsley
2 carrots grated
1/2 small onion thinly sliced
4 Tbl virgin olive oil (other oils can be used, but the flavor may lack richness)
1 1/2 Tbl fresh lemon juice (2 Tbl wine vinegar or apple vinegar will do.)
1/4 tsp salt
1/2 tsp freshly ground black pepper
1. Rub bowl with garlic, crushing pieces against side of bowl.
2. Add dry greens, distributing the sprouts.
3. Gently distribute carrots throughout salad (do not mash). Add onion, toss gently.
4. Drizzle oil over, toss to completely coat. At this point, the salad can wait several hours in the refrigerator for the last steps.
5. Add lemon juice, salt and pepper, and toss to disperse. Serve as first course for optimum pleasure and digestion.
Some people may miss the sugar found in prepared salad dressings. In that case, you may wish to add additional grated carrots or apples. For a hearty salad, small cheese cubes, ham cubes, bacon, toasted sunflower seeds or other addition can be considered. More elegant salads have relatively few ingredients however. Bon Apetito!
See also: Sprouts, Ester Munroe, Steven Greene Pr., Brattleburo, VT. (1974)
Chlorophyll and accessory pigments are used by leaves to collect energy from light and transduce it to chemical energy be used to synthesize sugar. These pigments can be separated by chromatography in which a solvent system travels through paper by capillary action, carrying the pigments with it. Because each pigment has a different solubility and/or affinity for paper, they move at different rates, and separate along the paper. We will use this technique to detect a variety of pigments, and separate them for further analysis.
Supplies:
Equipment:
Protocol:
PURPOSE:
Field hikes are a valuable way to learn biology because the flora and fauna being studied are by definition part of your environment, and therefore should be of immediate interest to you. We will take advantage of our semi-rural location to take an average of one field hike per week to a variety of ecosystems: College woods, fields and streams, the East Fork Reservoir, the East Fork of the Little Miami River, and Nine Mile Valley.
CLOTHES AND EQUIPMENT:
Dress comfortably and informally, with sturdy shoes. You should bring your notebook or 3 x 5 cards on which to take notes. Leave room in your notebook for supplementary information. If you use cards, the actual cards should be mounted in your notebook, with expanded notes supplied after the hike. Bring field guides appropriate for the subjects of the hike and binoculars for studying birds.
NOTES:
When a specimen of a new species is encountered, record its common name, its family (and other mentioned taxonomic info) its scientific name, and note the page in a field guide where it is described. Make a quick illustration to indicate important family and specific traits. Title the notes from each hike with a title that reflects that specific hike (i.e., not 1st hike, 2nd, etc). Cross reference the first page of each hike to its map and specimen.
SPECIMEN:
You are required to collect a specimen from each hike which is unique to that hike. Label with common and scientific names and mount in your book with contact paper. Cross reference to initial field notes page. See Contact Paper protocol.
MAP:
Draw a full page map for every hike showing: the route, unique features, and locations with direct labels for each new species were observed. Indicate north. Cross reference the map’s location and beginning of notes. We will pay particular attention to:
WILDFLOWERS:
Note carefully the family traits, specific traits, interesting information, date first seen blooming, and location on your map where the first specimen was observed. Brief illustrations will help immensely in learning these wildflowers.
TREES:
Most of these trees should be familiar to you from Fall and Winter quarters, but we will continue to review them this quarter. They will appear on quizzes and tests.
MUSHROOMS:
As the days warm up, especially after soaking spring rains, we will identify mushrooms, and note those which are edible. NEVER eat a mushroom which has not been positively identified in a book, and even then, eat very small quantities the first time you try them. Report all sightings of mushrooms to the group leader.
BIRDS:
Several hikes in the spring will concentrate on birds as they return or pass through on their migration north. Often a bird is first detected through its song, and therefore discussion should be kept to a minimum, in low tones or whispers. Look for tell-tale movement in foliage. Identify every bird you see, and if you see a new bird for the day, or one which you cannot identify, bring it to the group leader’s attention immediately. Binoculars will be used, with care (see binocular protocol).
OTHER ANIMALS:
Insects will be identified as they are encountered. Pay attention to the characteristics of each class, and the species. We will see occasional reptiles, amphibians, or mammals. Record identifying traits for these organisms as well.
CUMULATIVE LISTS:
Each time a new species is seen, add it to your cumulative list at the back of your notebook. Use of a computer to compile this list is strongly urged. See handout on format for details.
These lists should be single spaced, numbered chronologically, giving the common name, the scientific name (in correct format and in italics or underlined), the family name, the date first observed, and the page number in your notebook where information about its sighting is to be found. Look up the scientific and family names in the field guides listed in the syllabus (on reserve in the library). Spring wildflowers should be entered into the list when they are first observed blooming so that the list is a record of blooming times.
[tabs: 1.31″ 2.75″ 4.38″ 5.38″6.13″]
Notebook
No Common Name Scientific name Family date page
1 Dandelion Taraxacum officinale Compositae 3/27/00 p. 2
2 Queen Anne’s Lace Daucus carota Umbelliferae 3/27/00 p. 2
