INTRODUCTION
Yogurt is a fermented milk product which was apparently brought to Turkey by the mongols millenia ago. It is produced by adding a “starter” of active yogurt containing a mixed culture of Lactobacillus bulgaricus (or occasionally L. acidophilus) and Streptococcus thermophilus. These produce lactic acid during fermentation of lactose. The lactic acid lowers the pH, makes it tart, causes the milk protein to thicken and acts as a preservative since pathogenic bacteria cannot grow in acid conditions. The partial digestion of the milk when these bacteria ferment milk makes yogurt easily digestible. In addition, these bacteria will help settle GI upset including that which follows oral antibiotic therapy by replenishing non-pathogenic flora of the gastrointestinal tract.
Several factors are crucial for successful yogurt making:
- Good sterile technique (i.e., proper sterilization and cooling of the milk, proper cleansing and heat treatment of glassware, and keeping out unwanted bacteria). Note that Pasteurized milk still retains some bacteria which can give an off flavor, or prevent the starter from proper acidification. Scalding and cooling the milk ensures good results.
- Proper incubation temperature. Lactobacilli and Streptococcus thermophilus are thermophilic bacteria, meaning they prefer elevated temperatures for growth. At such temperatures (50 C, in this case) pathogenic or putrifactive bacteria are inhibited. However, even these thermophilic bacteria are killed if exposed to temperatures over 55 C (130 F), and do not grow well below 37 C (98 F). We will incubate at 50 C, a temperature on the high side of its preferred growth temperature (122 F), a temperature which inhibits the growth of pathogenic bacteria. (Note that many recipes call for cooler temperatures than this. We find the results less dependable when incubation temperatures are lower.)
- Protection of the starter from contamination. Do not open the starter (either Dannon Plain yogurt, or 8 oz starter from the previous yogurt batch) until you are ready to make the next batch.
Yogurt is preserved by its acidity which inhibits the growth of putrefactive or pathogenic bacteria. With lids intact, this yogurt will keep at least a month or two in the refrigerator. After that time, especially if your refrigerator is on the “warm” side, a layer of non-pathogenic white mold may form on the top. Merely lift off the mold with a fork, discard, and use the yogurt for cooking.
Baked goods will rise well when yogurt is used, again due to its acidity. Use yogurt as part or all of the liquid in cakes, waffles, pancakes and muffins, and cut down on the amount of baking powder. The thickness of yogurt helps to hold up the baking batter.
Yogurt is an excellent dish by itself, but is valuable in its many other uses.
The following recipe makes four quarts of yogurt. If you would like to make 2 quarts, here is the recipe . The following instructions may seem overly detailed, but I believe that the detail increases your chance of successful yogurt.
Yogurt Recipe: 4 Quarts
Ingredients:
1 gallon fresh milk (either store bought, or your own home grown milk)
(whole milk makes richer flavored yogurt, skim milk makes it non-fat)
starter: 1 cup Dannon Plain yogurt, very fresh
I prefer Dannon Plain, made purely with milk and culture. (Get the freshest: check the expiration date.)
Dannon Plain WORKS for me.
Others brands may work. The sad story is that “organic” yogurt may have sat on the shelf too long…
Equipment:
Double boiler (or heavy pot) with lid, capacity 1+ gallon
Four quart jars with lids, sterilized in boiling water
One 8 oz jar with lid, sterilized in boiling water.
Candy thermometer, reading range = -10 to 110 C (0 to 225 F)
A gas oven with a pilot may work if monitored closely.
1 medium sized “cooler”

Cooler Type:
Such as a “Playmate” or styrofoam with close fitting lid
Procedure:
 1. Sterilize jars and lids which will be used to make the yogurt. Place in a 5 gallon pot (here we are using a canner) with an inch of water in the bottom.
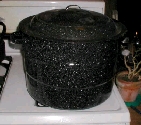 2. Cover and bring to boil. Boil for ten minutes; then, turn off heat. Do not remove lid.
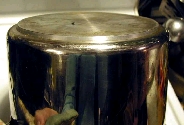 3. Use a pot with a thick bottom to scald the milk. Note the thick pad on the bottom of this pot. Alternatively, a double boiler may be used. It is not necessary to boil the milk. This gives the milk a “cooked” flavor, and increases the probability that it will burn on the bottom or boil over.
 4. Add one gallon of milk to the pot. You may use whole, 2% or skimmed milk. Here I am using my home grown goat’s milk.
 5. Heat the milk slowly over a medium fire (not so hot that it burns on the bottom). I am using a medium hot fire here with my thick bottomed pot.
 6. Scald until the temperature of the milk is 85-90 C (185-195 F). It is not necessary to boil, and do not let boil over…what a mess! (Many claim success leaving out this step. But… results may work, but intermittently…)
 7. Place the still covered pot in a pan of clean cold water to cool it down.
 8. Cool the milk to 50 to 55 C (122-130 F). Remove the pot of scalded and cooled milk from the cooling bath.
 9. Place one cup of the scalded and cooled milk in a two cup measure.
 10. Add enough fresh, uncontaminated yogurt to bring the level up to two cups.
 11. Stir to blend the yogurt starter into the scalded and cooled milk until homogeneous.
 12. INOCULATE:
Add the yogurt-milk slurry slowly to the 50 C scalded and cooled milk with stirring. (No hotter–you will kill the bacteria in the starter.) Stir very well to thoroughly distribute the yogurt starter.
 13. Once thoroughly mixed, distribute the inoculated milk to the sterilized jars, filling to the neck. Cover immediately with sterile tops. Tighten well.
 14. INCUBATE:
Warm a gallon of fresh clean water to 55 C, pour into a clean cooler. Place in a warm location. (It should cool to 50 C or below once the cooler is warmed up.) Carefully set the jars of inoculated milk in the water so the bottom of the lids are above the water.
 15. Check to see that the water in the cooler is close to 50 C (122 F). Above 55 C (130 F) kills the bacterial inoculum.)
 16. Close the cooler, place in warm place and let sit undisturbed for three hours. If the starter was active and the temperature correct, the yogurt will have gelled:
For more firm yogurt, try adding 4 Tbl powdered milk to the gallon of milk prior to heating (step 3). Frankly, I prefer delicate yogurt. Commercial yogurt in the States is often artifically gelled so that the yogurt can be shipped and still be solid when opened by the consumer at home. Fa schif…
Recently, I have switched to a two gallon stainless pot with a heavy pad of aluminum on the bottom. It considerably simplifies heating the milk. So long as you heat it to 85-90oC (185-195o F) without burning, that is what is required. Once the milk has been scalded and cooled, you can even add the starter directly to the pot, and make the yogurt in the pot. It is better aseptic technique.
YOGURT HAS MANY USES:
- My favorites include:
In place of sour cream. Add dollops:
-to baked potatoes
-on rice dishes
-on bowls of soup (especially lamb stew, chili or borscht)
with hot chili (works as an oral fire extinguisher too!)
- In cucumber-yogurt soup, (khyar b’laban) a fabulous Middle Eastern summer dish, made with yogurt, garlic, sliced cucumbers, salt to taste and topped with crushed mint. It is served chilled.
- As a liquid (or portion of the liquid) in baking soda-raised breads, waffles and pancakes
- As labneh (sometimes also known as laban, although strictly speaking, laban is yogurt), a Middle Eastern soft cheese, (an easy yogurt cheese). It can be made by hanging lightly salted yogurt in a clean cloth, permitting the whey to drip into a bowl. It is delicious served with pulverized spearmint and olive oil as a dip with lightly toasted pita bread. For illustrated instructions: how to make labneh .
- As ayran (pronounced I-Ron), a wonderfully refreshing cold summer drink commonly consumed in Turkey where I drank it with gusto. In the words of Tekin Topuzdag, a cheese making friend in Turkey who sent me this recipe by email:
- “How to make is extremely simple: Mix yoghurt with (about quarter amount of yoghurt) water and pinch of salt. Mix them well in blender (good sign of mixing is: bubbles, lots of them). Serve with ice in hot summer days.”
- As a starter for cheese
- As a starter for yogurt (see above for how to do this)
Check any Middle Eastern cookbook for a variety of uses.


